Getting started with ElasticProbe

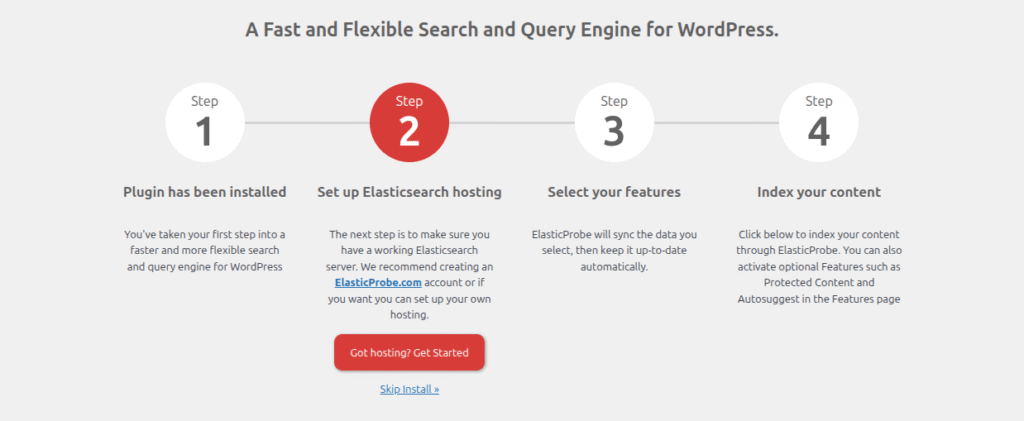
You’ve come to the right place to improve your website’s search capabilities. Let’s check out how you can start with an ElasticProbe.com account. You are two steps away from using ElasticProbe:

  • Install the plugin.
  • Connect your ElasticProbe.com account to the ElasticProbe plugin.

Installing the ElasticProbe plugin on your website

The ElasticProbe plugin can be both connected to an ElasticSearch self-deployed service or our hosted service. Our hosted service considers the many nuances of the ElasticSearch and provides you with a secure and fast service out of the box.

  1. To install the plugin you can either:
    • Head to our Github page and download the latest ZIP file and then upload it to your website from the admin panel through Plugins-> Add plugin-> Upload plugin
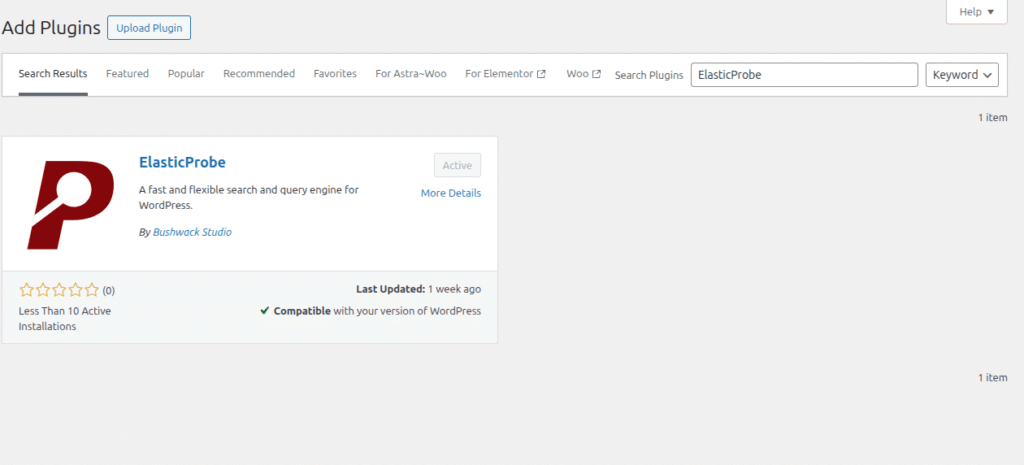
    • For the easiest installation, on your website’s admin panel, head to Plugins-> Add plugin and search for ElasticProbe. This will install the latest version directly from the Wordpress plugin directory.
  1. Activate the plugin

Wordpress directory search result

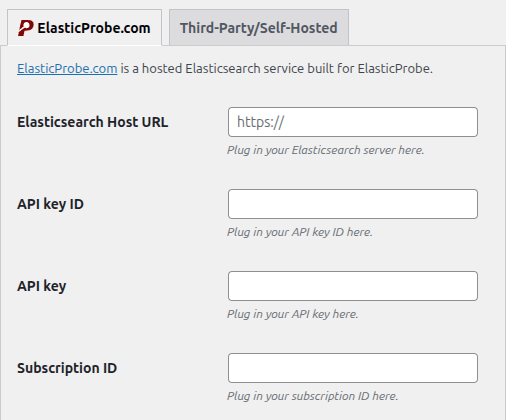
Connecting the plugin to ElasticProbe.com account

The plugin needs an installation of ElasticSearch or ElasticProbe.com account to function. If you don’t have an ElasticProbe.com account yet, you can sign up for one of our plans.

Once you have your account ready, a configuration wizard will help you the first time. Hit the “Got hosting? Get Started” button.

Getting started - step 2

In the next screen provide your ElasticProbe.com account info. These are all available from on your subscription info page on the My Account section. Head over to your subscription and you can see all the required configuration information.

Getting started - settings page

The next step (Step 3), lets your enable or disable some of the most used features. Check all that you need and click “Save Features” to proceed to the next step.

Getting started - step 3

Step 4 is the last step of the process. This is where your website content is indexed by the plugin. Hit the “index your content” and you are ready to go.

Gettings started - step 4

What are the next steps?

Depending on your website’s content length and count, it will take some time to index your content. After that ElasticProbe will take over the search process and improve things for you. You can check out the indexing process at the plugin Dashboard-> Sync. This is located on your website’s admin panel.

There are more tutorials available at our Resources section for each plugin feature, so be sure to check them out.

Our News section will also contain new version announcements and in-depth articles.

If you ever feel stuck or have a question feel free to open a Github issue or reach us at contact [at] elasticprobe [dot] com.