
Handling Typos with the Did You Mean Feature
ElasticProbe includes a smart “Did You Mean” feature that automatically detects and corrects typos in user search queries. When a misspelled term is entered, ElasticProbe compares it against the indexed content and returns relevant suggestions based on likely matches.
Configuring Did You Mean Feature in ElasticProbe Plugin
- Log into your WP admin area (e.g.,
https://yourdomain.tld/wp-admin). - Locate ElasticProbe in your list of installed plugins from the sidebar and click on it.
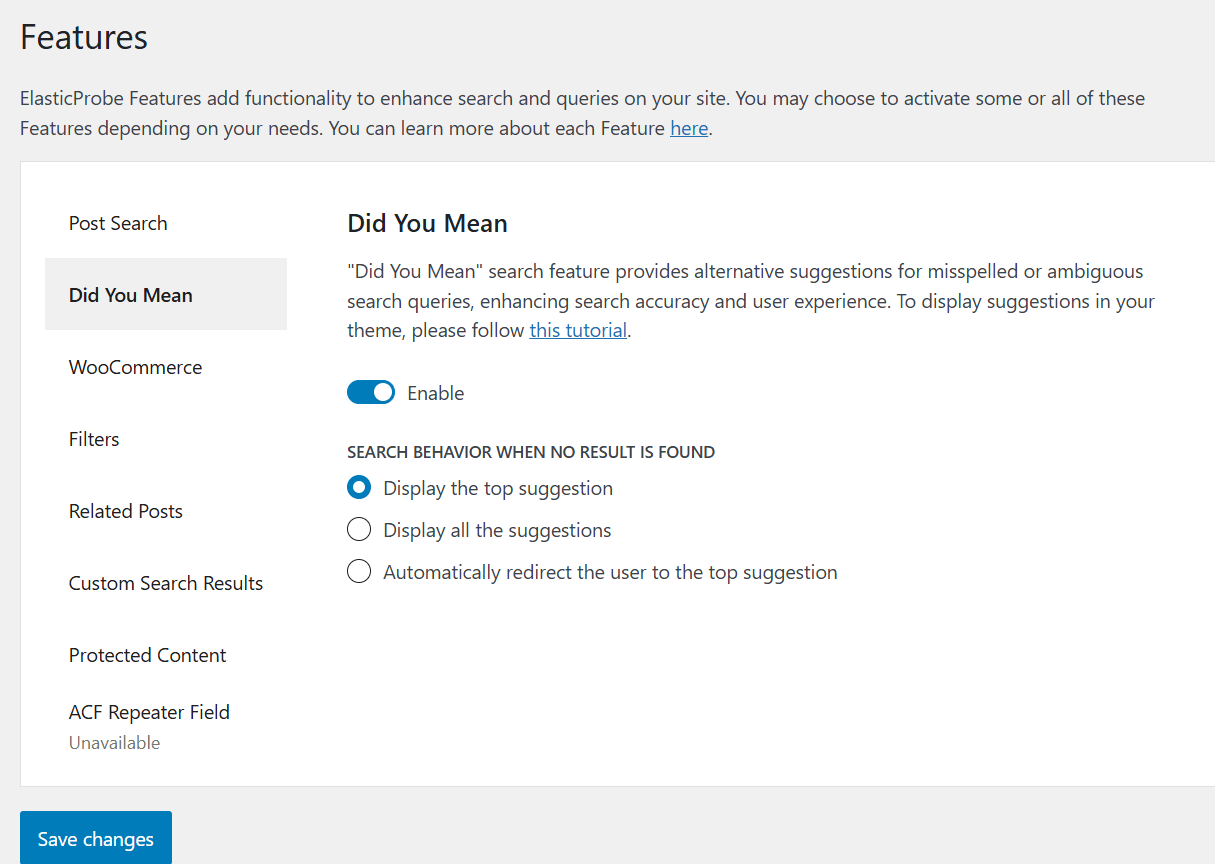
- Navigate to the Did You Mean section in the feature list and activate the feature by selecting the Enable radio button. Then, choose one of three options available:
Display only the top suggestion: This setting allows you to show just the most relevant alternative term to the user.
Display all suggestions: With this option, users will see a full list of suggested alternative search terms.
- Automatically redirect to the top suggestion: This will send users directly to the search results page for the top suggested term, bypassing the empty results page.
Theme Integration
Enabling the “Did You Mean” feature through the ElasticProbe plugin dashboard is only the first step. To actually display suggested search terms on your website frontend—especially when a user’s query returns no results or contains a typo—you must add a specific code snippet to your WordPress theme. This manual step is essential for the feature to work as expected. Check out the best ways of applying such custom codes.
To show these suggestions on your website, you need to add a specific code snippet to your theme’s search template:
<?php do_action( 'eprobe_suggestions' ); ?>
This line allows ElasticProbe to connect with Elasticsearch and display alternative terms when:
A typo is detected in the search query, or
The suggested term yields more search results than the original one.
Customizing the Output of Suggestions
ElasticProbe provides powerful flexibility to customize how search suggestions are displayed on your site through the use of WordPress filters. This means you can tailor the appearance, structure, and even behavior of the suggested terms that appear when a user enters a misspelled or low-result search query.
You can change how the suggestion list is rendered using the eprobe_suggestion_html filter. This filter provides three parameters:
$html: The original HTML output generated by ElasticProbe.
$terms: An array of all suggested search terms.
$query: The
WP_Queryobject for the current search.
Here’s an example that modifies the HTML to list all suggested terms in a custom format:
/**
* Customize the display of suggested terms.
*
* @param string $html The default HTML output.
* @param array $terms Suggested search terms.
* @param WP_Query $query The current WP_Query object.
*
* @return string Modified HTML output.
*/
add_filter(
	'eprobe_suggestion_html',
	function( $html, $terms, $query )  {
		$html  = '<ul class="ep-suggestions-list">';
		$html .= '<li class="ep-suggestion-item">' . esc_html__( 'All suggested terms', 'elasticprobe' ) . '</li>';
		foreach( $terms as $term ) {
			$html .= '<li class="ep-suggestion-item">';
			$html .= '<a href="' . esc_url( get_search_link( $term['text'] ) ) . '">' . esc_html( $term['text'] ) . '</a>';
			$html .= '</li>';
		}
		$html .= '</ul>';

		return $html;
	},
	10,
	3
);
Customizing the HTML output can help you:
Match your theme’s design by adjusting markup structure and adding custom CSS classes.
Insert icons (e.g., magnifying glass, arrows) next to suggestion links.
Highlight the original query and how it differs from suggestions.
Group suggestions by type (e.g., title match, taxonomy match, etc.) if needed.
Add tracking data attributes (e.g.,
data-track-id) for analytics tools.
Example: Styled Suggestion Output with Icons
This version adds:
A heading label (“Did you mean:”)
A surrounding container with the class
ep-suggestions-boxA magnifying glass emoji next to each term
You can easily swap this for an SVG or icon font if needed.
					add_filter(
    'ep_suggestion_html',
    function( $html, $terms, $query ) {
        $html  = '<div class="ep-suggestions-box">';
        $html .= '<p class="ep-suggestion-label">Did you mean:</p>';
        $html .= '<ul class="ep-suggestions-list">';

        foreach ( $terms as $term ) {
            $html .= '<li class="ep-suggestion-item">';
            $html .= '<a href="' . esc_url( get_search_link( $term['text'] ) ) . '">';
            $html .= '<span class="ep-icon">🔍</span> ';
            $html .= esc_html( $term['text'] );
            $html .= '</a>';
            $html .= '</li>';
        }

        $html .= '</ul>';
        $html .= '</div>';

        return $html;
    },
    10,
    3
);